

Explore My Latest Projects
Featured Project
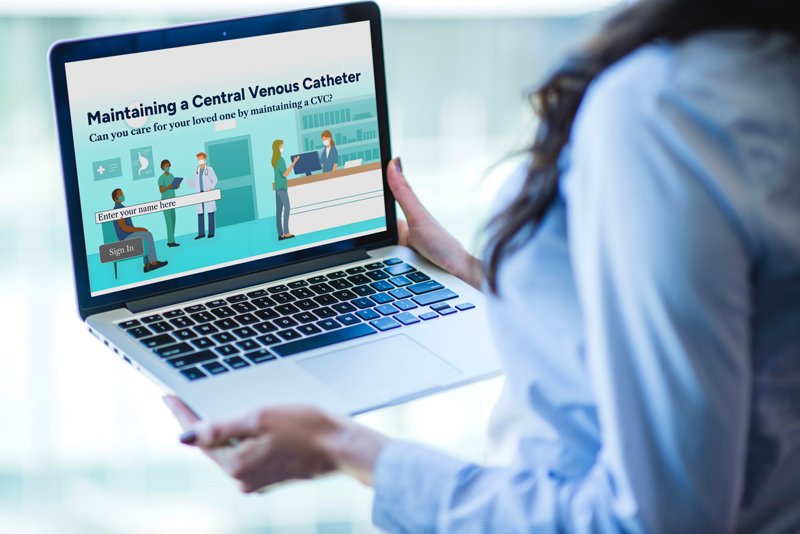
CVC Line Maintenance eLearning Experience
This scenario-based eLearning training experience is designed for anyone taking on the responsibility of a caretaker who maintains the patient’s central venous catheter (CVC). This project provides the ideal, risk-free environment for those without medical training to make choices in taking care of their loved one.
Audience: Relatives of patients
Responsibilities: Instructional Design, eLearning Development, Visual/Graphic Design, Storyboard and Script Writing, and Mockups.
Tools Used: Articulate Storyline 360, Adobe Illustrator, Freepik AI Editor, MindMeister, Figma, Microsoft Suite, and Google Suite.
Overview
The Problem
Hospitals (the client) instruct the patient’s caretakers in various procedures to maintain the patient’s health when the patient leaves the hospital, one of which includes the support of a CVC line. Having been in this situation, I noticed the training did not go further than a one-time instruction and demonstration. As a result, my caretakers felt uncertain and anxious. Moreover, the potential to forget steps or improperly complete the procedure could compromise the patient’s health. Hospitals are understaffed and work long hours, generating this need to provide proper training to sufficiently prepare caretakers.
The Solution
Seeing this disparity between expectation and experience, I knew that caretakers needed an environment in which they could practice performing these procedures at their own pace while also allowing for mistakes that do not compromise the health of their loved one. Therefore, I proposed a scenario-based eLearning experience that does just that.

My Process
My process consisted of two steps: concept and design. In the first step, I created an action map that laid out the goal and direction of the project before the storyboard broke down the details within the map. Next, in the design step, I generated mockups for the overall look and feel of the project. This led to prototyping the designs until I landed on the finished product.
Action Map
Since the problem came from a lack of training and general uncertainty of actions, I knew the goal of the project was to reduce the mistakes made by the caretaker when maintaining a CVC line. I communicated with a subject matter expert (SME) to identify the essential actions in the procedure that caretakers must take to successfully keep the CVC line in good shape.
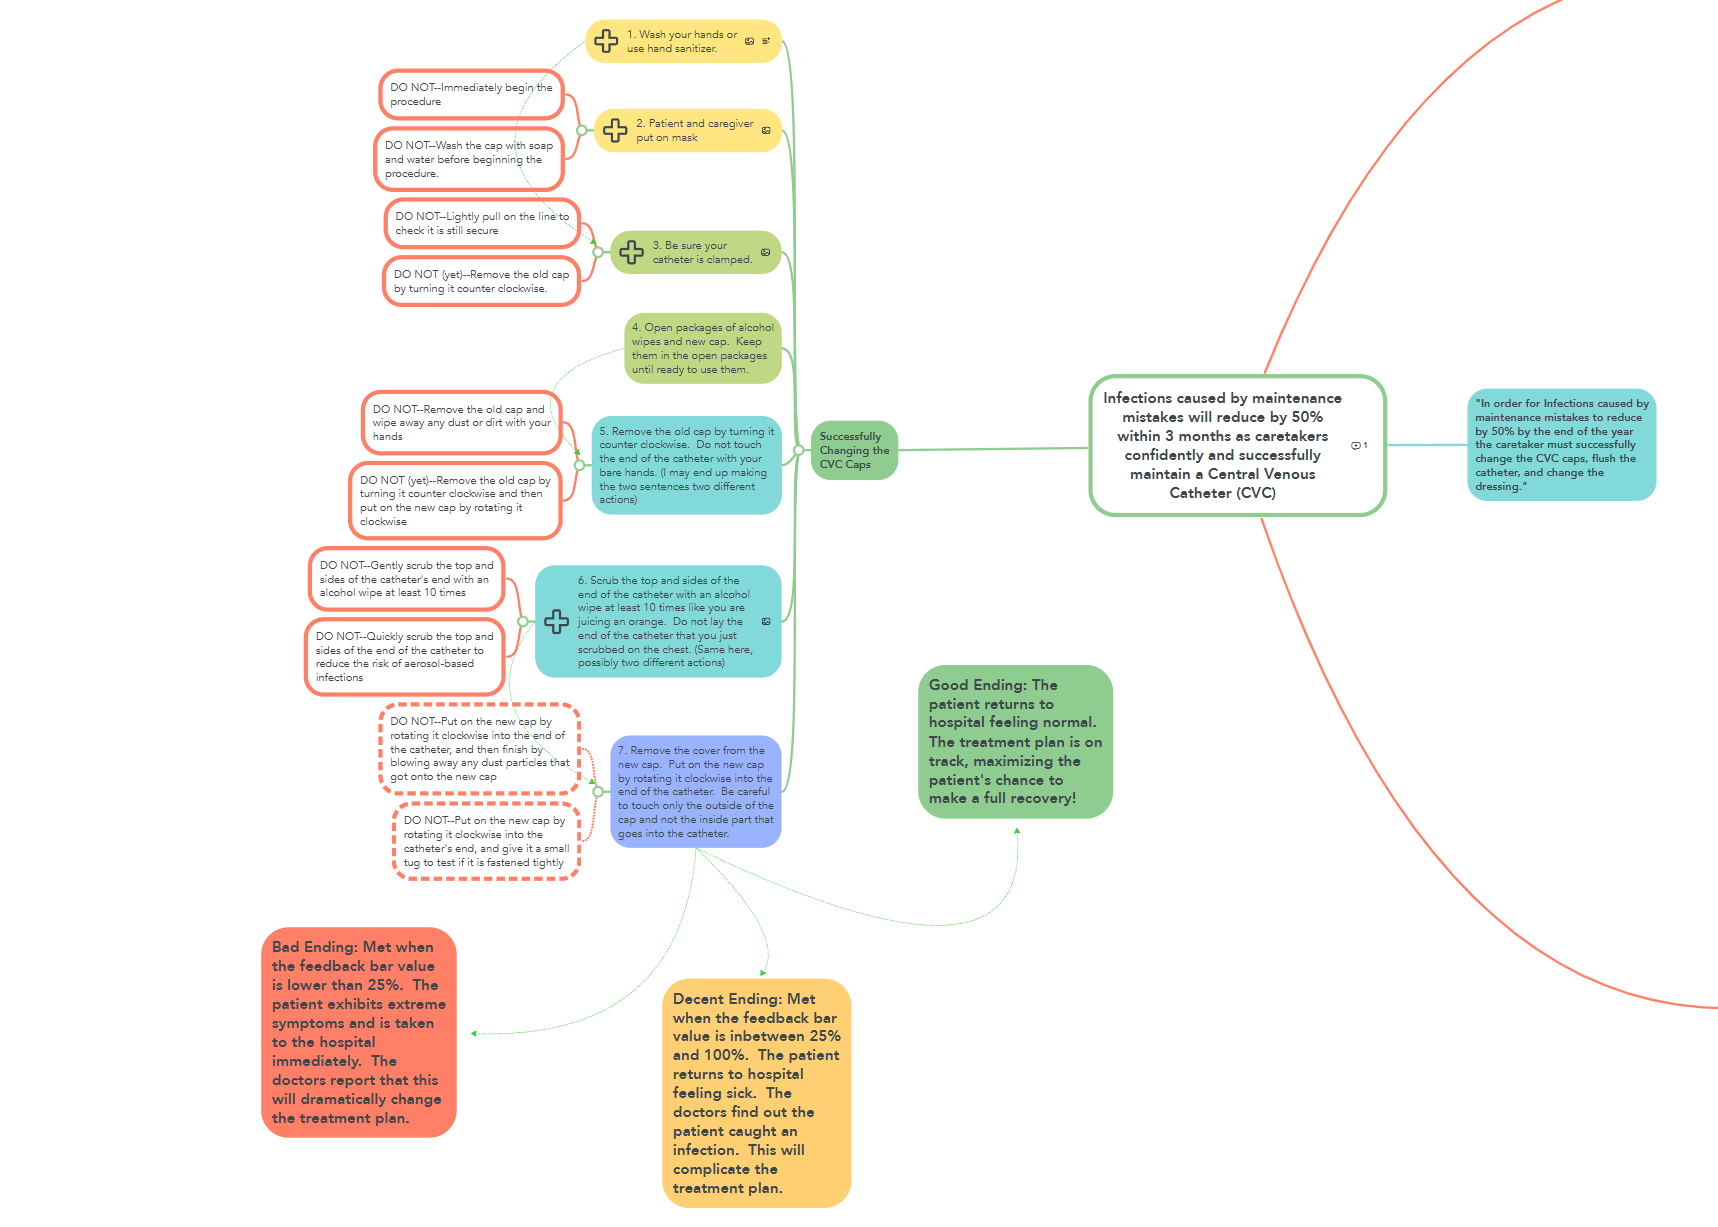
The action map proved highly useful in organizing all this information. It made it easy to lay out the successful actions, the common mistakes, and the consequences resulting from the caretaker’s actions. I am glad I incorporated action mapping into my process because having the goal at the forefront made it simple to find the actions that will lead learners to accomplish the goal.
Text-based Storyboard
Having the goal, actions, and consequences all mapped out, the next step in the process was writing the storyboard. In this step, I collaborated further with an SME to build an authentic experience consisting of one right action and two distractors with each choice having consequences.
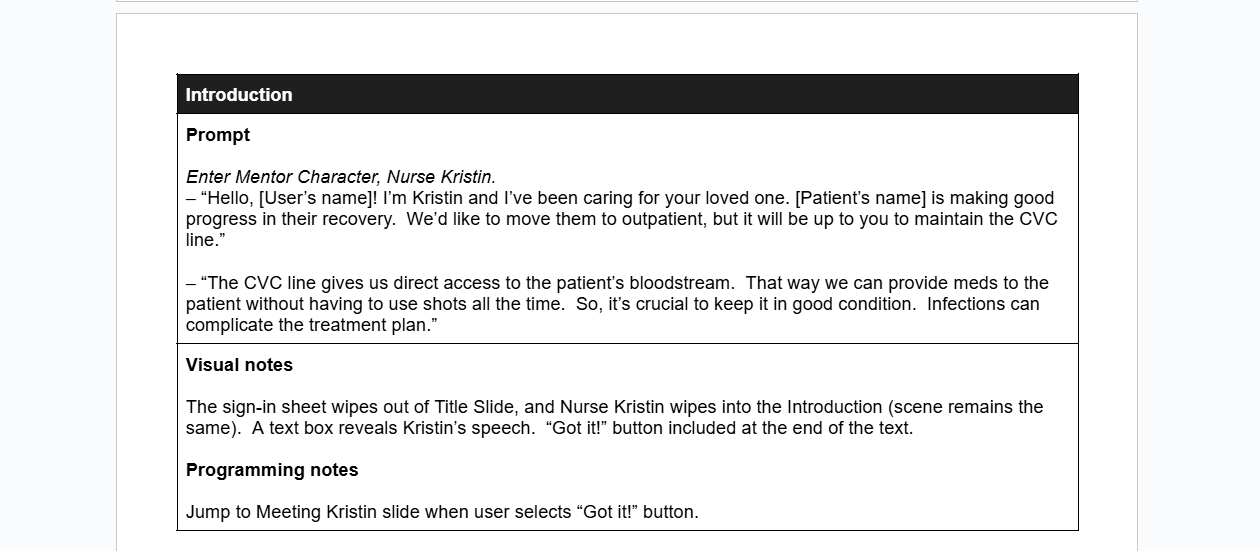

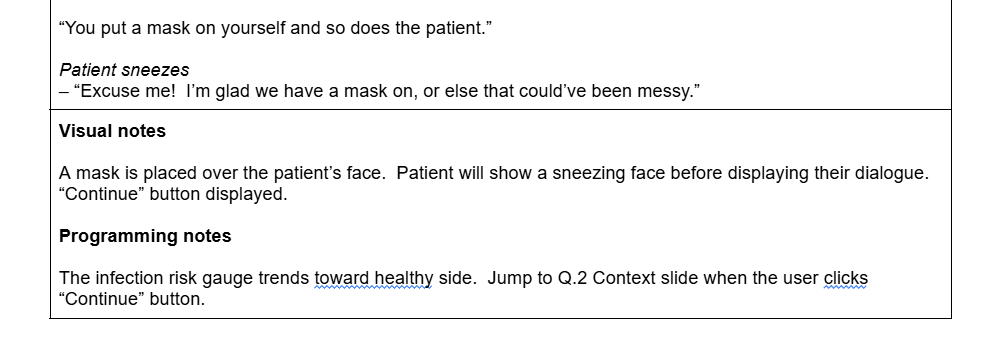
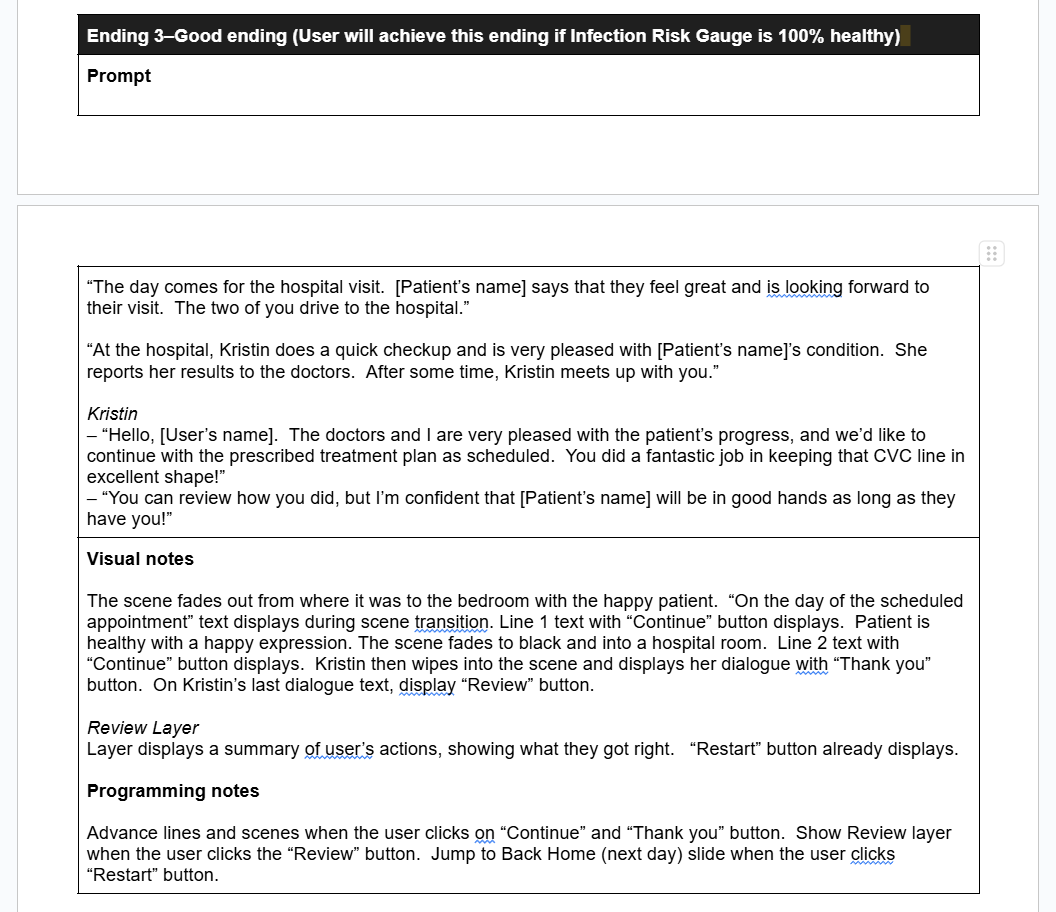
As I received and applied feedback, the story came to life as the audience helped the patient get better with each good action while worsening their condition with every wrong action. Considering I was the patient in the story, I found it fitting to make the mentor character a nurse (a job aid) who would give information on-demand to guide the audience towards the right actions.
Visual Mockups
With the script laid out, the time came for visuals, and the mood board made this part much easier as it sparked a lot of the inspiration and style for the project. From the mood board, I put together a style guide to aid with consistency.

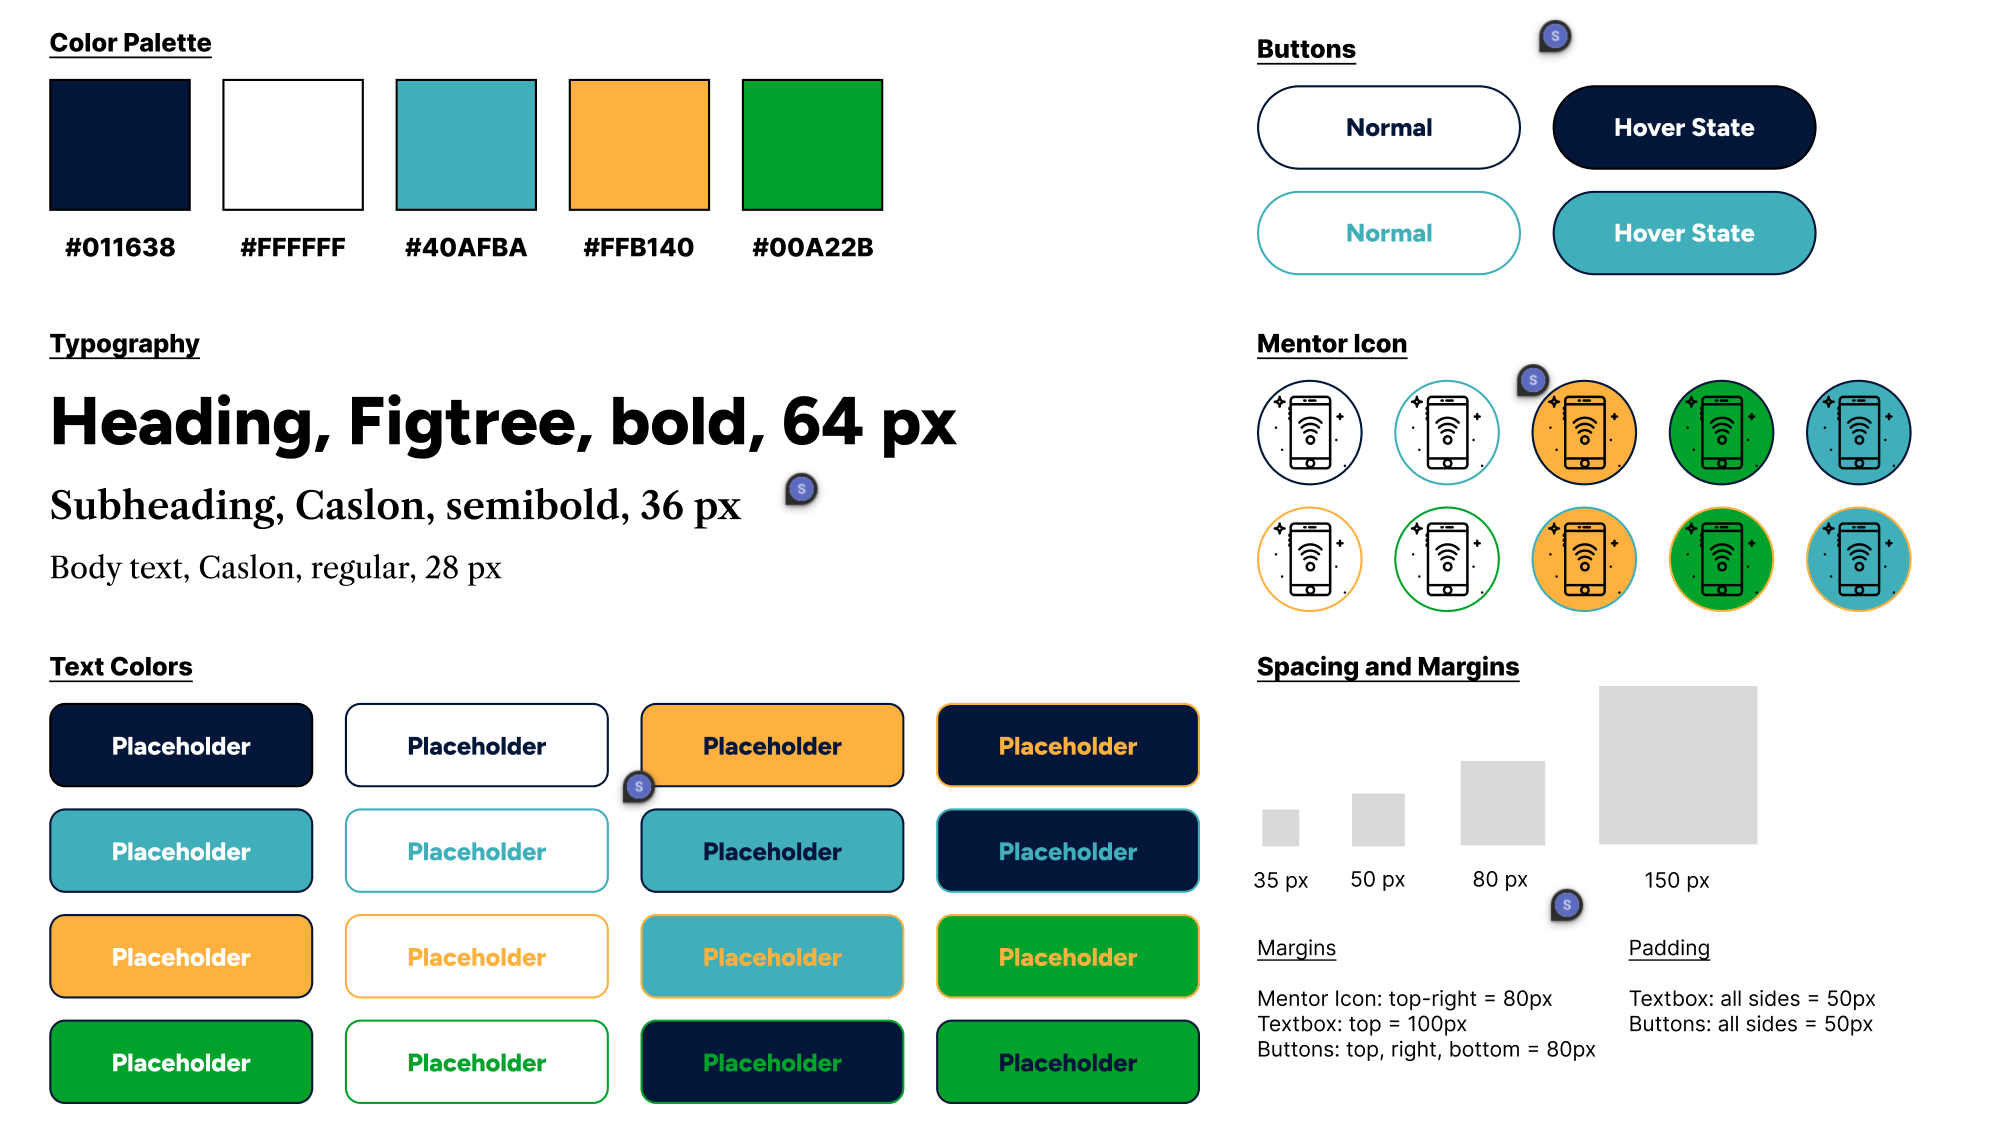
Next, I merged everything together into wireframes and mockups. After enough iteration of scenes and assets, I landed on something I found fitting for the learner. I chose to keep the design relatively simple and straightforward to not overload the audience, but I built animations within the navigation and actions to keep the experience engaging and easy to follow.


Additionally, I knew a large part of the project was to let the audience make mistakes to better learn how to do the procedure. So, I designed the project with the audience’s results at the end so they could see where they did well and where they needed to improve.
Interactive Prototype
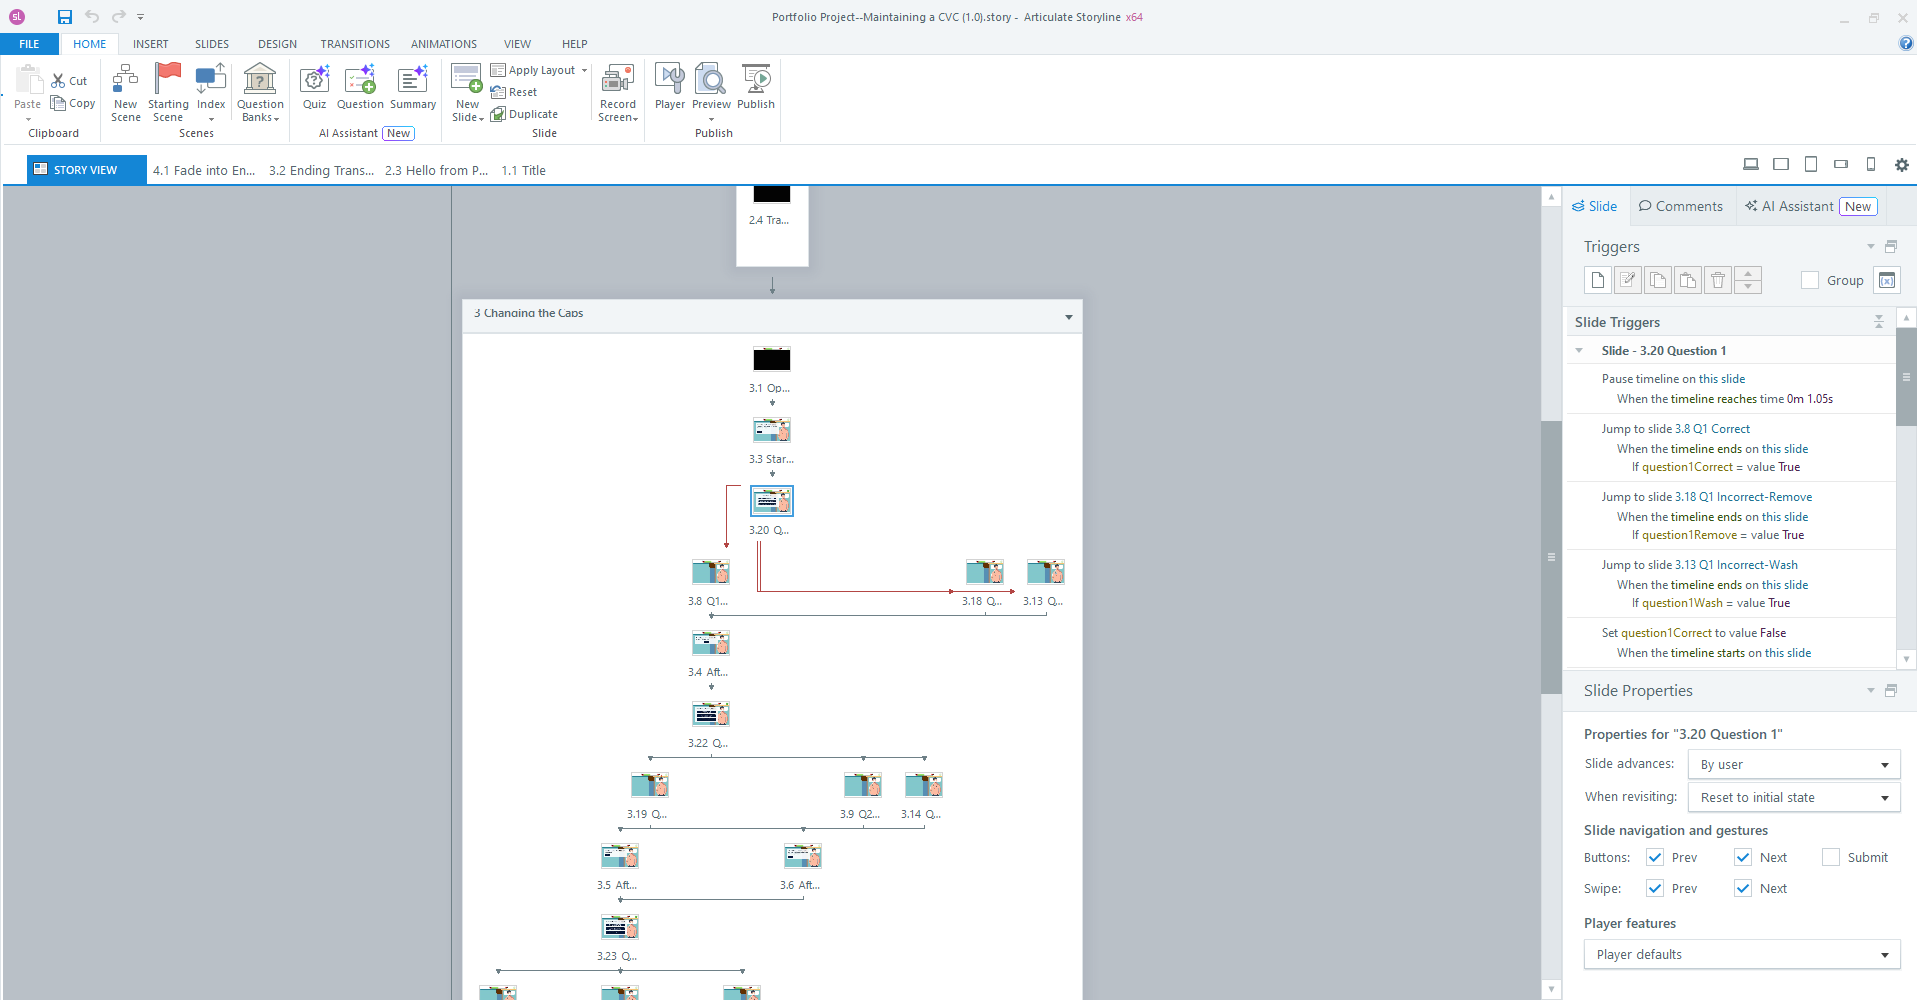
In the middle of creating the mockups, I also developed the assets and scenes I needed using a mixture of Adobe Illustrator and Figma. Then I carried it all into Articulate Storyline 360 where I brought everything to life by building the states, programming the triggers, and assembling the animations.

Once I got a working prototype, I asked for feedback from my community, SME, and friends and family, which I then implemented into the project. This helped to correct several unworking triggers, refine the visuals, and better direct the experience toward the learning objective.
Full Development
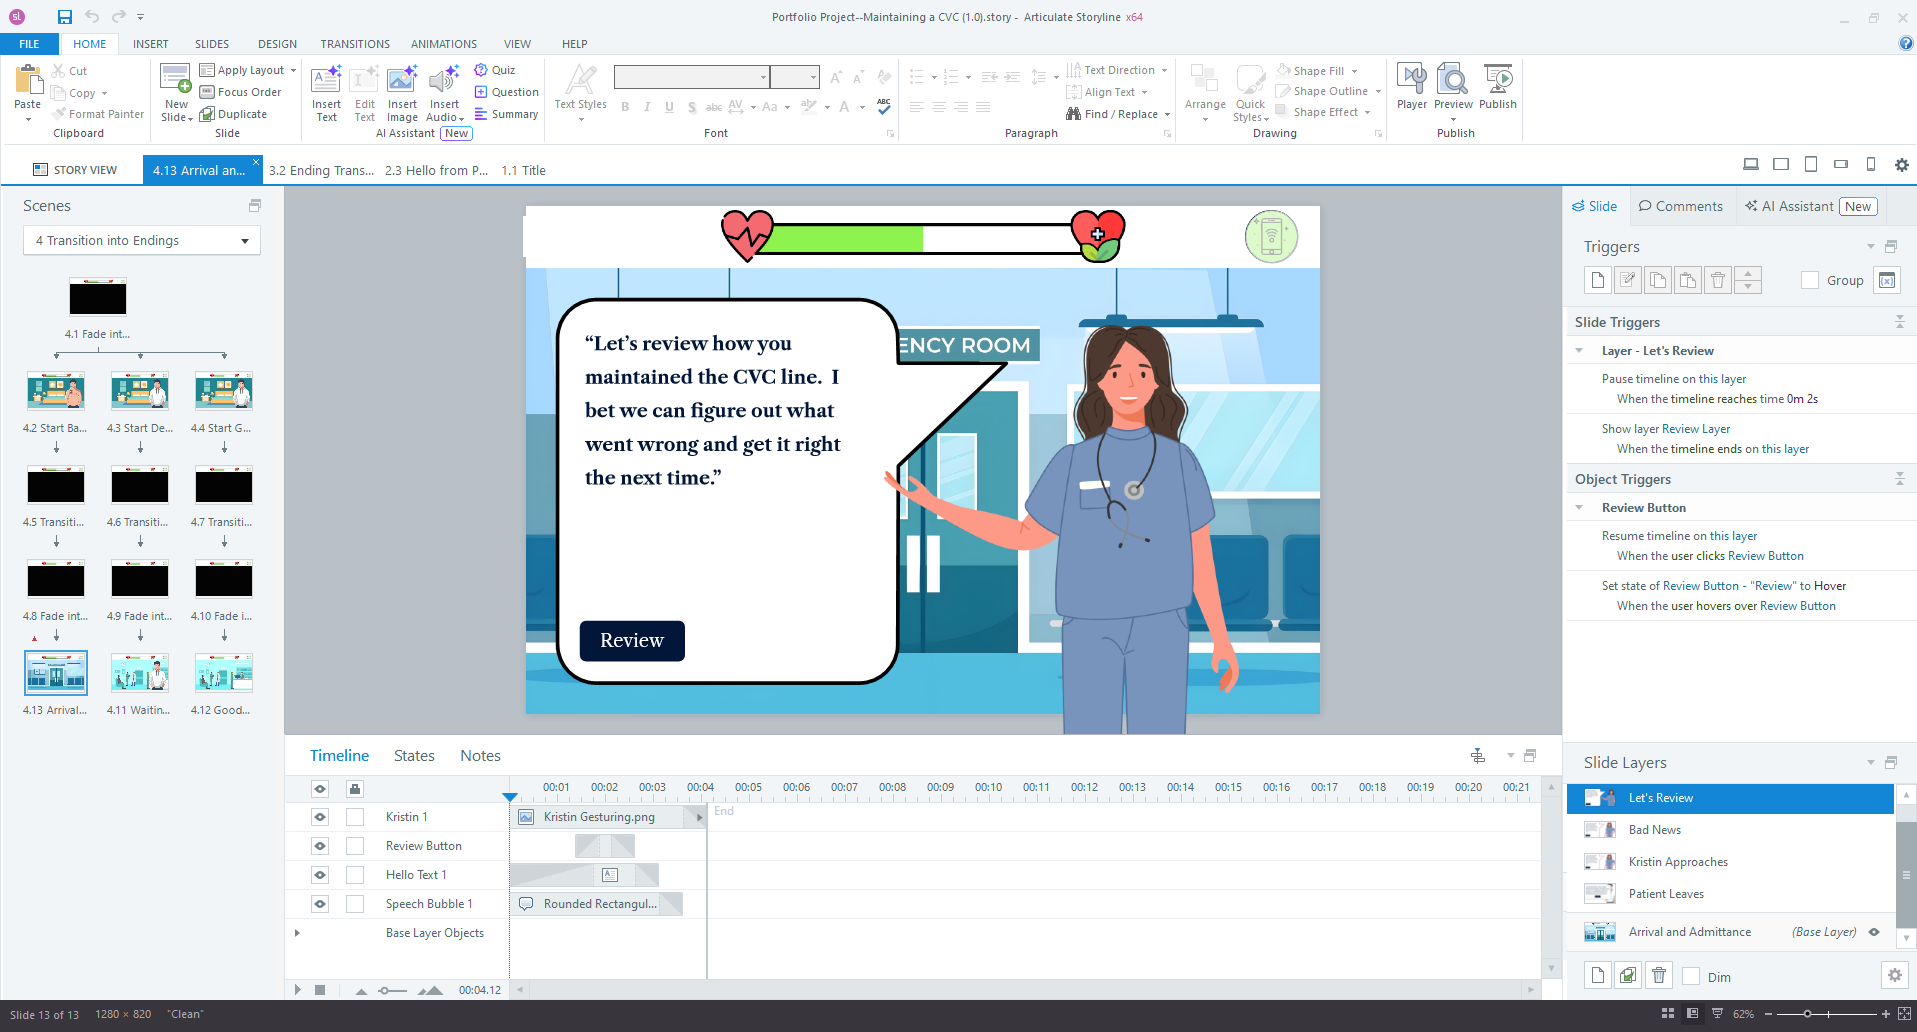
After obtaining all the feedback, I created the entire project. I am particularly proud of the animations and transitions since they required careful manipulation around the timeline combined with the many variables. I used creative, out-of-the-box thinking to create the gauge at the top of the screen with Articulate's slider feature. The last thing that I really enjoyed implementing was the results screen at the very end because my teaching side activated, allowing me to provide meaningful feedback to the audience.


Results and Takeaways
This project provided me with valuable experience and insight in the Instructional Design world. I understood the process of identifying learning areas, developing creative solutions, writing up a meaningful course, designing everything from the ground up, and refining things through trial and error as well as through feedback implementation. It also pushed me to learn many useful online tools such as Figma and Adobe Illustrator to make the task more straightforward. I learned so much about vector graphics and graphic design as I put this project together.
When I shared my project with others, it was received well as other instructional designers commended the visual appeal as well as the different endings depending on the learners performance. My personal caretakers mentioned that they wished they had something like this when they were taking care of me. Although this is a conceptual project, the next step would be to implement this project with learners and collect data on their performance, the decrease/increase of caretaker-related infections, and their feedback. I would use this data to edit the project to meet the desired goal more effectively.
Moving forward I would lean further into AI tools. I generated most of what I wanted through Freepik’s AI generator and editor, and I could edit them further using Adobe Illustrator/Figma to get them in the form I needed. There are, however, bigger possibilities through the use of video and audio tools generated using AI. It would be exciting to see what could be made through the use of such softwares.
Hiking Preparation Guide Tab Interaction
This simple tab interaction includes information on hike preparation. See what you need to be ready for the outdoors.

Food Categorization Drag-and-Drop Activity
A fun, drag-and-drop activity that challenges learners to categorize different foods. This project demonstrates my skill in creating interactive and engaging content.